
- Subscribe to RSS Feed
- Mark as New
- Mark as Read
- Bookmark
- Subscribe
- Printer Friendly Page
- Report Inappropriate Content
Overview
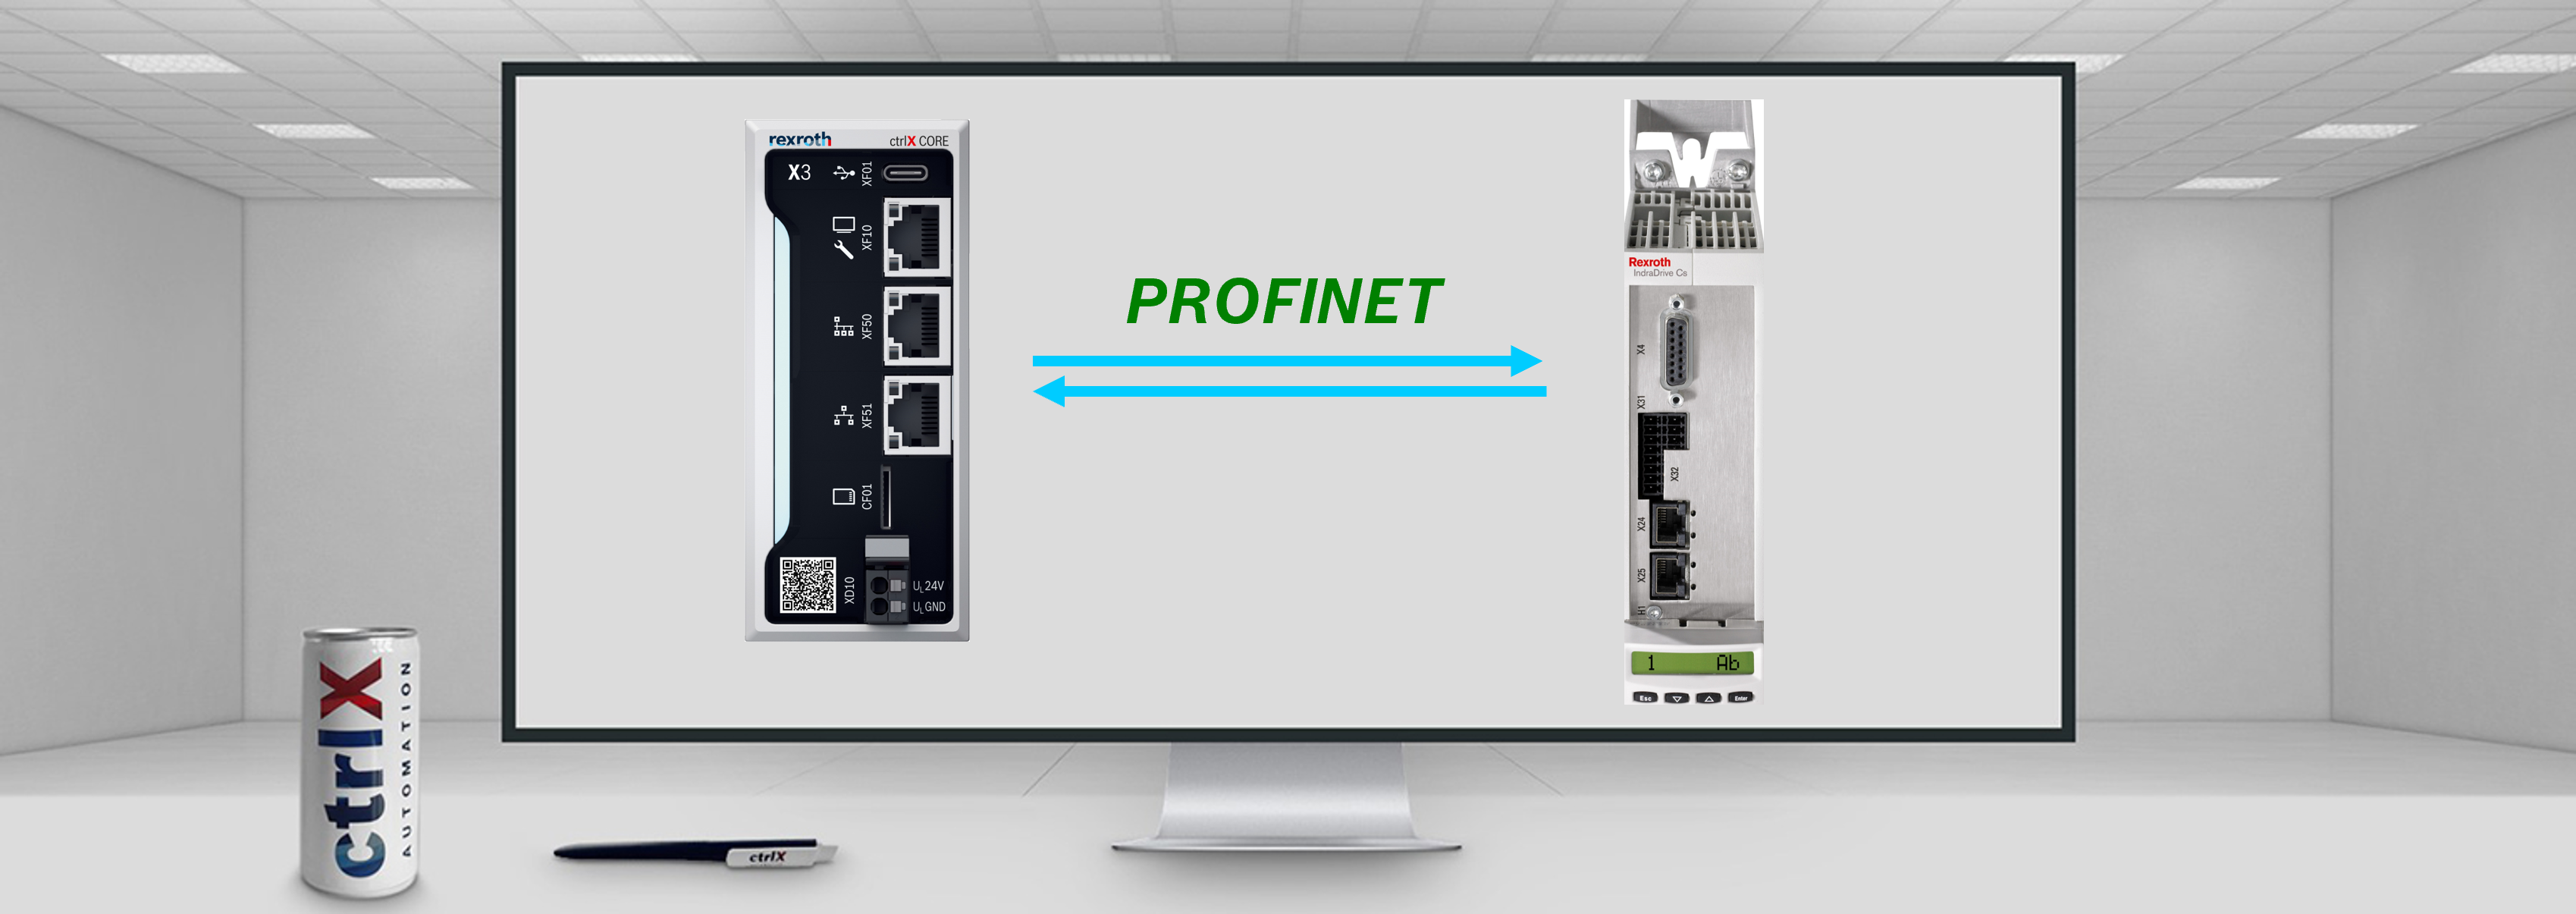
In this tutorial, it will be shown how to connect an IndraDrive Cs device to a ctrlX CORE X3. The ctrlX CORE X3 will be the Profinet controller (PN-Controller), and the IndraDrive will be the Profinet device. The IndraDrive device will be connected to the Ethernet port (XF51) of the ctrlX CORE, and the CoDSys fieldbus library will be used to configure the connection.

Prerequisites
Configuration
Note: Before starting with the configuration it is required to install the CoDeSys Fieldbus libraries. Please follow the steps shown here: Manual - CODESYS Fieldbus communication packages for ctrlX CORE. In the case the user has access to the collaboration room, download the packages from this link.
1. From the ctrlX CORE side it first requires to configure the Network configuration in the “Settings” side:
- Go to “Settings”
- "Connectivity"
- Select the "eth1" connection
- Go to the "IPv4" menu
- Choose an IP address (It is recommended to choose a different one to eth0) Something of the type 192.168.0.X
- Save configuration

2. IndraDrive configuration file import
NOTE: It is required to have the .xml file of the IndraDrive device.
- Open the PLC program. In the Menu, select “Tools” -> "Device Repository" -> "Install" -> Select the .xml file with the PN-Device information.

- Once successfully imported, the imported device should be visible:

3. Add ethernet device:
- Right click over "Device" -> Select “Add device”
- Select “Ethernet”
- Press “Add Device”

4. Add PN-Controller device. As in this case, the ctrlX CORE will be the PN-Controller, it is required to select this type of device in the configuration.
- Right click over "Ethernet" -> "Add device"
- Select "PN-Controller over Profinet IO Master"
- Press "Add device"

5. Once the PN-Controller is imported, in the Device tree, new trees with the task’s priorities will be added

- Now it is required to change the priorities:
Double click over "Profinet_communicationTask" -> Include a priority of 37 as a recommendation

For the Profinet_IOTask the same steps are followed:
Double click over "Profinet_IOTask" -> Write a priority of 30 as a recommendation

6. Scan the IndraDrive device:
- Right click over "PN_Controller" -> Select "Scan for devices"
- Check the found devices
- Copy All devices to project -> Close the window

Troubleshooting: If error messages appear during scanning, it is recommended to add the device manually:
- Instead of clicking over "Scan for devices", click over "PN_Controller" -> "Add device"
- Look for the previously added "IndraDrive" description and add it to the project tree by pressing "Add device"
- Perform step 10 of this tutorial and log out again
- Scan again with right click over "PN_Controller" -> "Scan for devices" and copy the device to the project
- The manually added device can be deleted and you can keep the new one
- Continue with the Tutorial
7. Configure ethernet IP Address:
- Right click over "Ethernet"
- "Browse"
- Select eth1 connection as it was the one previously configured in the ctrlX CORE web interface
- Press “Ok”

8. Configure PN-Controller:
- Double click over "PN_Controller"
- Give a station name
- Configure the PN-Device IP Address. The IP Address is required to be 192.168.0.X as this was the defined type of network

9. Configure the input or output to be able to read the values:
- Double click over the input we want to read
- Select the "PNIO Module I/O Mapping" tab
- Expand the variable
- Select "Enabled 2"

10. Test the configuration: "Generate code" or press "F11" -> Login in the ctrlX CORE to transfer the PLC program -> Run the program

- Read the received values

NOTE: If the symbols are orange, it means that it does not have license.

Related Links
- PROFINET - READ PROFINET DEVICE APP VALUES FROM CTRLX PLC ENGINEERING
- PROFINET - CONNECT CTRLX CORE PLUS X3 WITH INDRACONTROL XM21
- PROFINET - CTRLX CORE X3 WITH CTRLX CORE PLUS X3
- PROFINET - CTRLX CORE PLUS X3 WITH INDRACONTROL XM21
- PROFINET - CONNECT CTRLX CORE X3 WITH CTRLX CORE PLUS X3 WITH FIELDBUS LIBRARIES
- CODESYS fieldbus add-on installation guide for ctrlX AUTOMATION

You must be a registered user to add a comment. If you've already registered, sign in. Otherwise, register and sign in.