
- Subscribe to RSS Feed
- Mark as New
- Mark as Read
- Bookmark
- Subscribe
- Printer Friendly Page
- Report Inappropriate Content
1. Overview
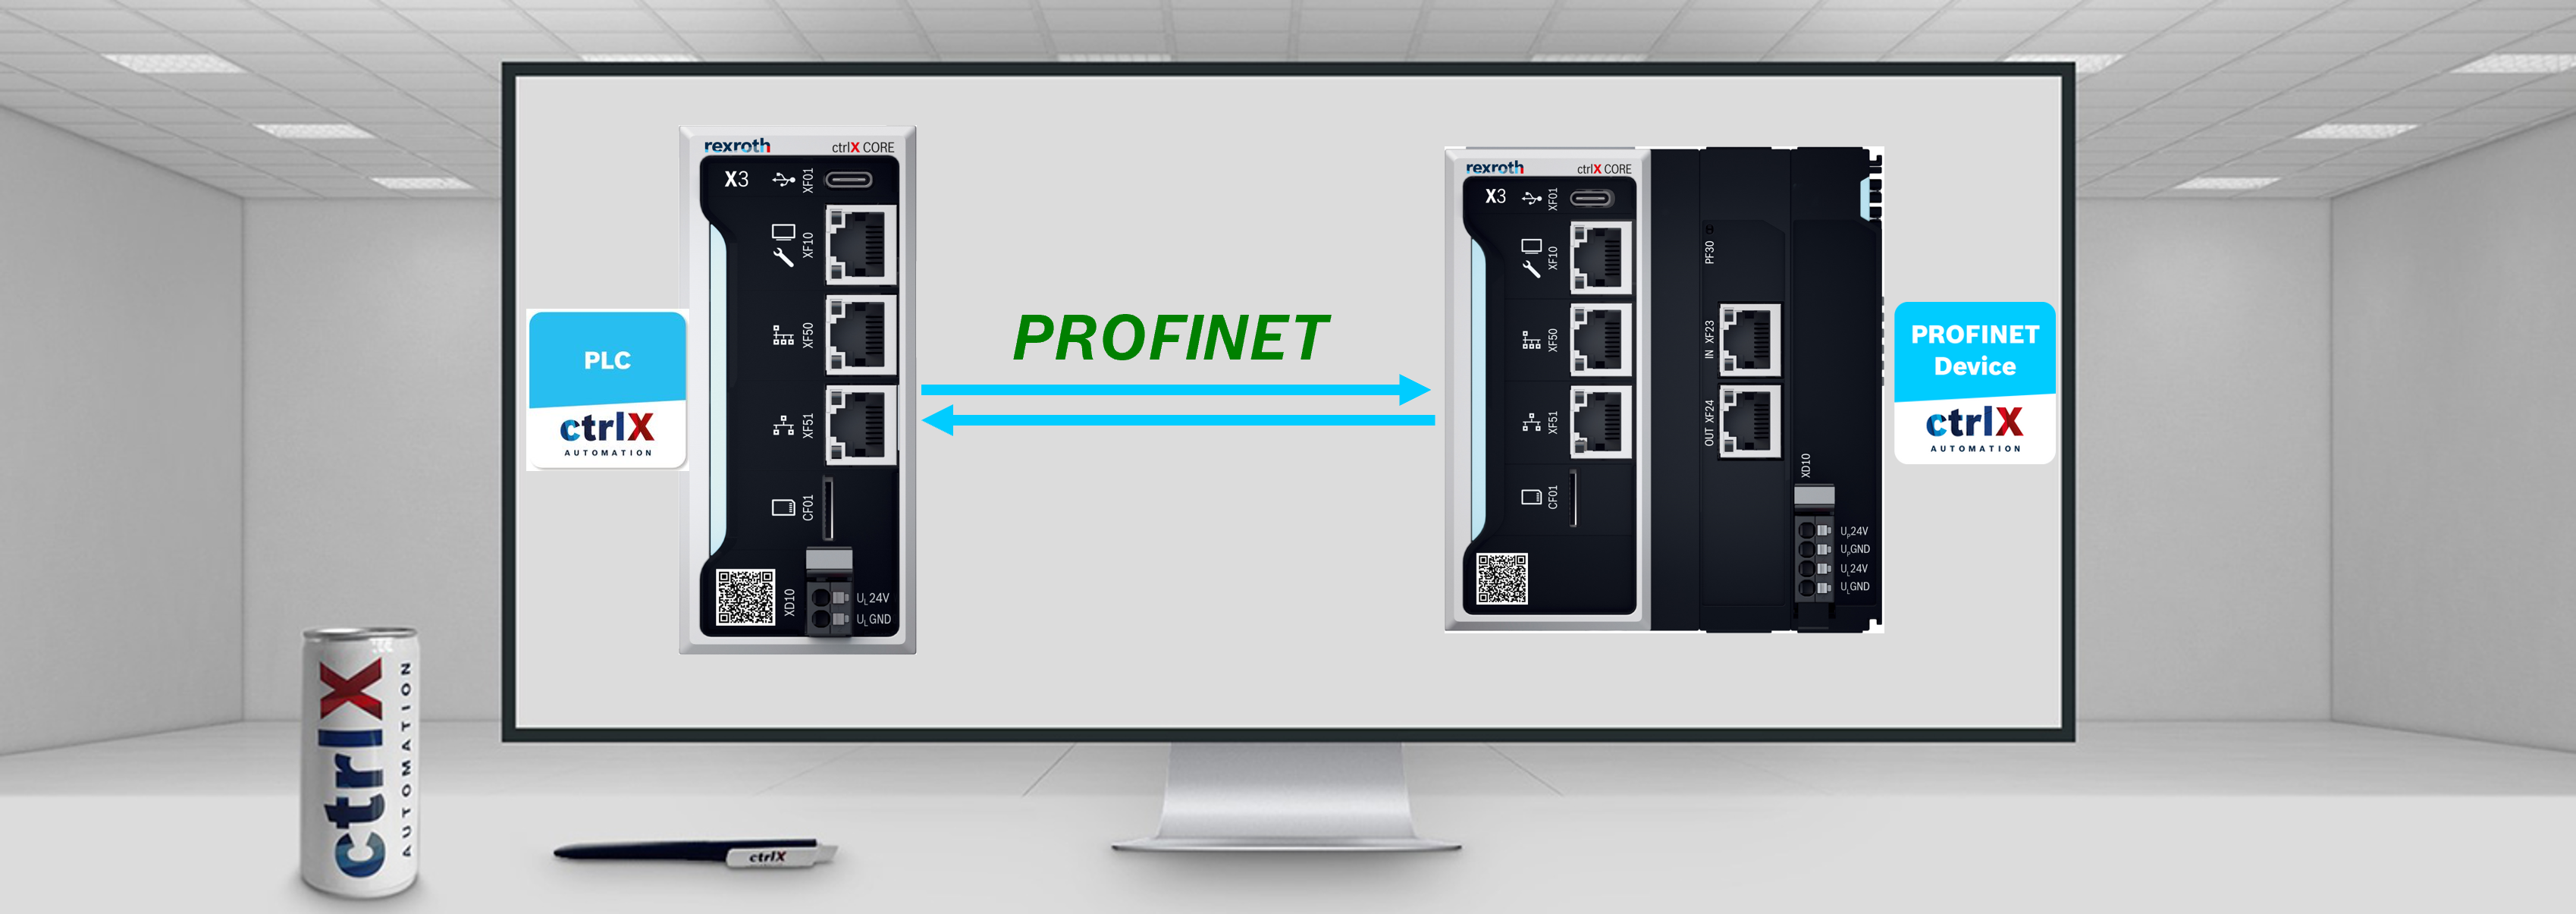
In this article, it will be shown how to connect two ctrlX CORE's using the PROFINET Device app and the CoDeSys fieldbus libaries. The ctrlX CORE X3 will act as PN-Controller and it will be configured using the PLC Engineering program. On the other hand, the ctrlX COREplus X3 will use the PROFINET Device App. Additionally, it is important to note that in the ctrlX COREplus X3, the Profinet port will be used, but in the ctrlX CORE X3, the Ethernet port (XF51) will be used.
CoDeSys Fieldbus libraries
The CoDeSys libraries have the biggest flexibility configuring the Profinet connection. It is possible to completely configure a Profinet Device and a Profinet Controller (Master). It is possible to define the PN-Controller parameters and also the PN-Device attached to it. Additionally, all exhanged data is available in the PLC program. In the case the user wants to read the PLC data in the Data Layer, it is also possible to define some global variables to read the values of interest.
On the other hand, the configuration process is much longer and complicated due to the amount of aspects required to take into account. Additionally, it is required to have the PLC Engineering program. Otherwise, it is not possible to perform the configuration in the ctrlX CORE web interface.
PROFINET Device app
The PROFINET Device app has the advantage to be easily configurable. In a few clicks it is possible to configure the connection and have an idea of the connection state. Additionally, no external programs are required. With the ctrlX CORE web interface it is possible to configure the connection and to read the values from the Data Layer.
On the contrary, with the PROFINET Device app it is not possible to configure a PN-Controller and it is limited to a PN-Device. As for establishing a Profinet connection, it is required to have a Profinet controller and a Profinet device, it is not possible to connect two ctrlX COREs using the app.

2. Prerequisites
3. ctrlX CORE X3 (PN-Controller) configuration
Note: Before starting with the configuration it is required to install the CoDeSys Fieldbus libraries. Please follow the steps shown here: Manual - CODESYS Fieldbus communication packages for ctrlX CORE. In the case the user has access to the collaboration room, download the packages from this link.
1. Open ctrlX PLC Engineering program and create a new project
- Create a new project
- Select ctrlX CORE template
- Provide a name
- Press "Ok" to close the window

2. Communicate to the ctrlX CORE X3
- Right click over "Device"
- Select "Communication settings"

- Enter the ctrlX CORE X3 IP address
- Press the "Run" button
- Press "Ok" to close the window

3. Add ethernet node
- Right click over "Device"
- Select "Add device"

- In the Profinet IO tree, select "Ethernet" and press "Add device"

4. Configure Ethernet node
- First it is required to define a static IP address in the ctrlX CORE web interface
- Go to the ctrlX CORE web interface and go to "Settings"
- Press "Connectivity"
- Select the "eth1" connection
- Go to the "IPv4" tab
- Enter the IP address we want to define. In this case 192.168.2.12 and to provide the subnet mask enter /24 which is the 255.255.255.0 subnet mask
- Press "Save" to keep the configuration

- Now, we return back to the ctrlX PLC Engineering program and perform the following steps:
- Double click over "Ethernet"
- In the general tab, press "Browse"
- Select the eth1 connection which should have the previously defined IP address
- Press "Ok" and the window will be closed

5. Add Profinet Controller
- Right click over "Ethernet"
- Select "Add Device"

- In the Profinet IO Master tree, select PN-Controller and press "Add device"

6. Change priorities
Double click over "Profinet_communicationTask" -> Include a priority of 37 as a recommendation

For the "Profinet_IOTask" the same steps are followed:
Double click over "Profinet_IOTask" -> Include a priority of 30 as a recommendation

7. Add ctrlX COREplus X3 repository
- In "Tools" -> Select "Device Repository"

- Press "Install" button

- Select the .xml file to import it

- Now a new device should appear in the PLCs section

8. Add ctrlX CORE to the device tree
- Right click over "PN_Controller"
- Select "Add device"

- In the PLCs -> ctrlX CORE section, select "ctrX CORE" and press "Add device"

9. Configure ctrlX CORE node
- Right click over "producer"
- Select "Plug Device"

- Double click over "module_out"

- With the window still open, double click over "consumer"
- Doube click over "module_in" and close the window

10. Add input and output
- Right click over "producer"
- Select "Add device"

- In the Profinet IO -> Profinet IO Submodule -> consumer -> byte, select "byte_128_out", and press "Add device"

- Add input
- Without having closed the previus window, double click over "consumer". Otherwise, Right click over "consumer" -> "Add device"
- Select "byte_128_in"
- Press "Add device"

4. ctrlX COREplus X3 (PN-Device) configuration
1. First, the ctrlX CORE will be connected to the Engineering computer and the CtrlX Works program will be started.

2. Install PROFINET device app. Access Bosch Rexroth in the following link
- To perform this step, it is recommended to follow the instructions shown in the following article.

- The app is installed. In the ctrlX CORE web interface the “Settings” menu is clicked -> Access “Apps” -> Change to “Service mode” because otherwise it will not be possible to install the app, and the “Install from file” button is clicked. A new window will be opened where the previously downloaded file is selected.


3. Add PROFINET device:
- Access the PROFINET device app
- Check that the ctrlX CORE is in “Service” mode (Otherwise it will give an error as shown in the figure)
- “Add PROFINET device”

Error that appears in the case the PROFINET device is added in “Operating” mode

4. Add PROFINET device

5. Configure PROFINET device:
- Click the pencil button
- Select template (this has to be chosen in function of sent data from the connected device to the ctrlX CORE)
- Save configuration

5. Testing
1. Run the PROFINET Device app

- As the PLC program is still not running in the other ctrlX CORE, the state will be "Safe-OP"

2. Go to the ctrlX PLC Engineering program and login to transfer the PLC program to the ctrlX CORE

- Accept the message

3. Run the PLC program

- Check that both devices are connected by seeing the following symbol in the PLC program

- Check in the ctrlX COREplus X3 that the state has changed

Note: If the user wants to test if the device sends data, it is possible to write a little program and later read the values in the Data Layer. All these procedures can be found in the other sections of this article.
6. Related Links
- PROFINET - CONNECT CTRLX CORE X3 WITH INDRADRIVE
- PROFINET - READ PROFINET DEVICE APP VALUES FROM CTRLX PLC ENGINEERING
- PROFINET - CONNECT CTRLX COREPLUS X3 WITH INDRACONTROL XM21
- PROFINET - CTRLX CORE X3 WITH CTRLX COREPLUS X3
- PROFINET - CTRLX COREPLUS X3 WITH INDRACONTROL XM21
- CODESYS fieldbus add-on installation guide for ctrlX AUTOMATION
