
- Subscribe to RSS Feed
- Mark as New
- Mark as Read
- Bookmark
- Subscribe
- Printer Friendly Page
- Report Inappropriate Content
Introduction
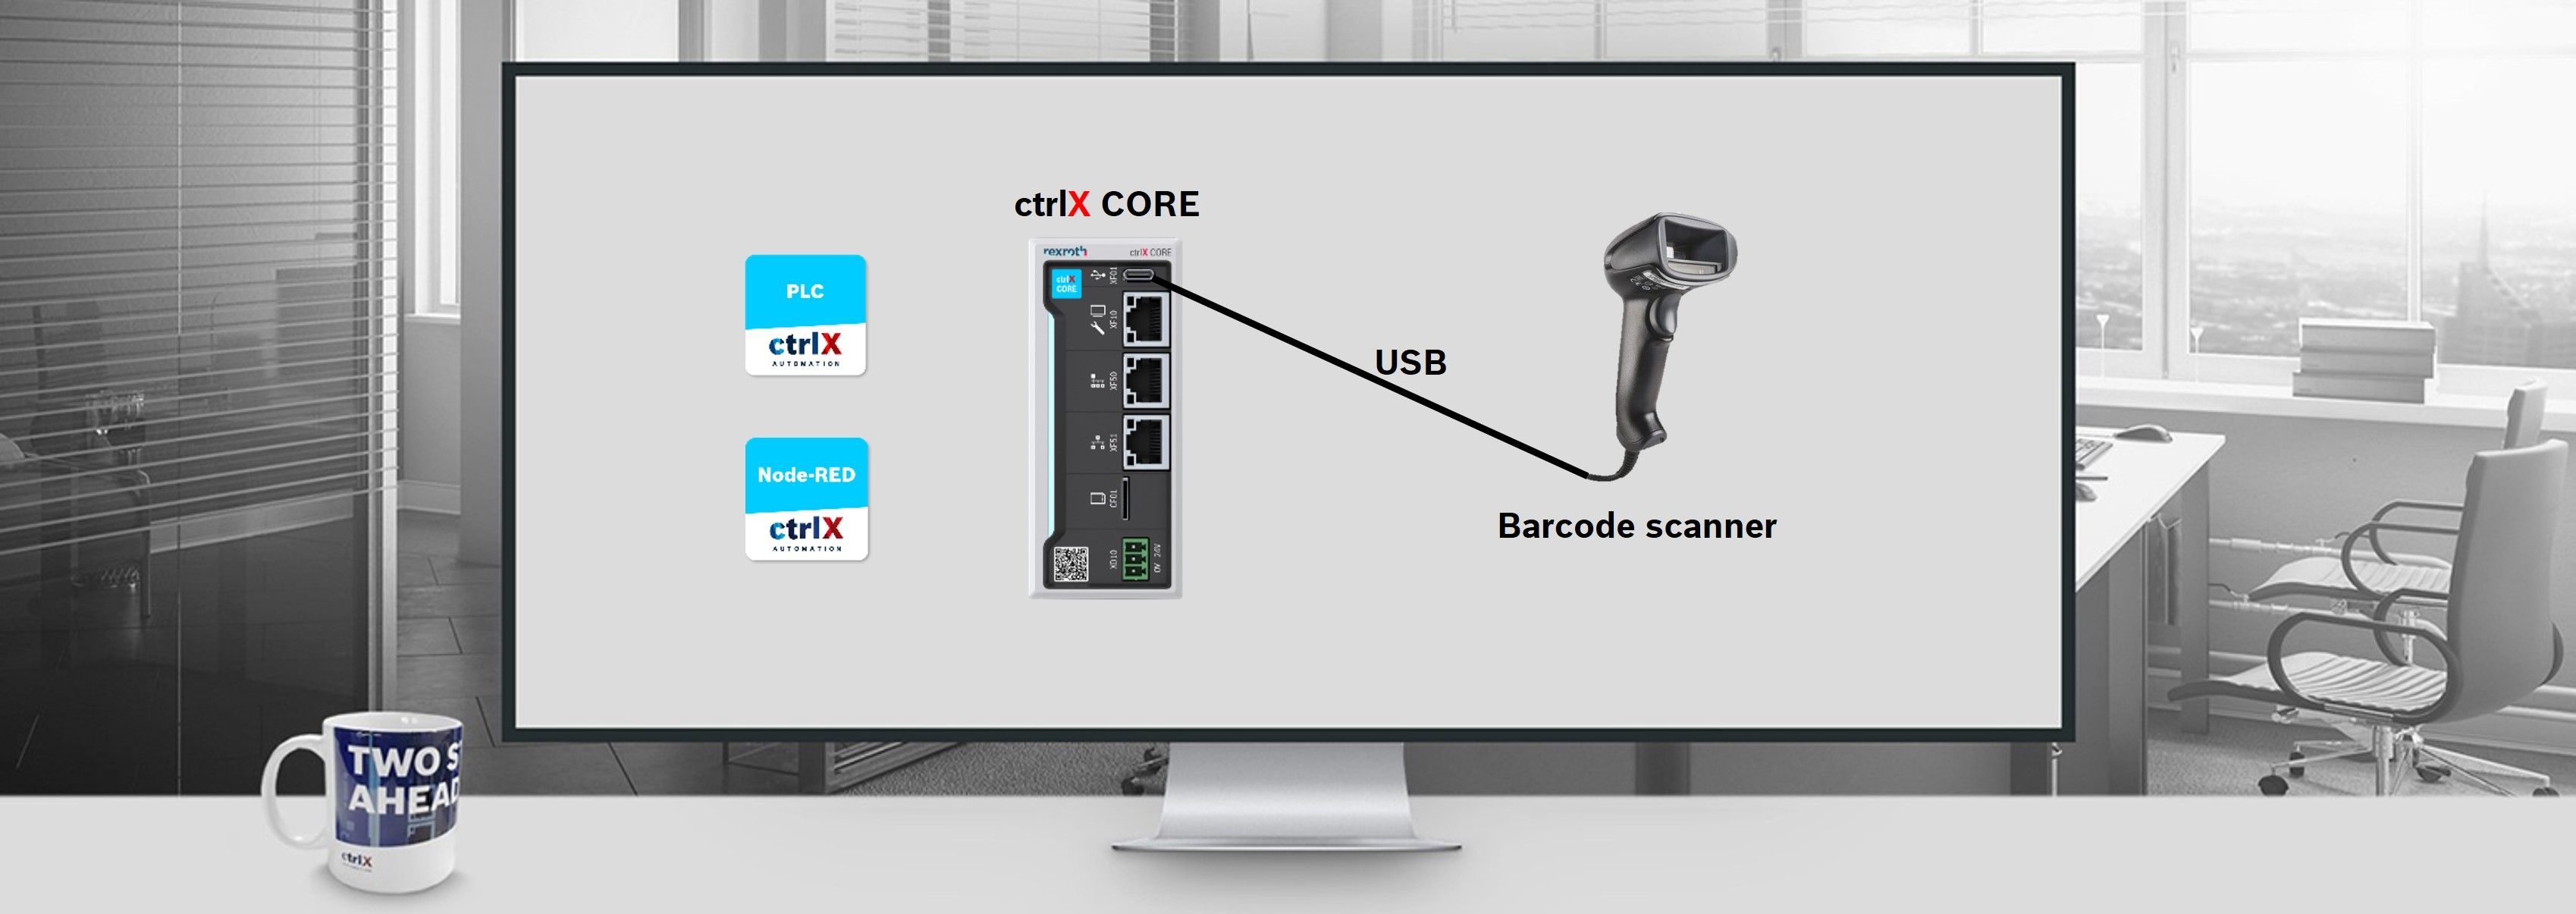
This How-To explains how to read a 2D barcode with a scanner. The scanner is connected to the ctrlX CORE via the USB-C port. The data can be read in with the PLC or Node-RED application.
Prerequisites
- ctrlX CORE
- 2D Barcode Scanner (this examples uses the Voyager XP 1470g) with USB to USB-C adapter
- Pre-installed PLC or Node-RED app
Scanner Configuration
To begin, the ctrlX CORE must be connected to the computer and the scanner to the ctrlX CORE. The scanner is then programmed using a reference code.
The basic configuration described in this point is the same for the Node-RED as well as for the PLC App.

- Connect the ctrlX CORE to the computer via the engineering port and open ctrlX WORKS (Quick Start Guide ctrlX CORE).
- Connect the Voyager XP 1470g 2D scanner to the USB-C interface of the ctrlX CORE.
- To reset the scanner to the factory settings, scan the Activate Custom Defaults barcode below.
- Scan the following code to programme the scanner. Scanning this code also adds carriage return and line feed.
Note: Depending on the country, port or characters being scanned, a different reference code must be used. Different reference codes are listed in the Voyager User Guide.


Example Barcode
To test the examples below, a test barcode is created with the content "Hello World".
Different barcodes can be created with this online configurator.

A) Realisation with Node-RED
With Node-RED, the scanner configuration can be realised graphically in a browser by inserting nodes.
- Open the Node-RED App using the ctrlX Works interface.
-
In the Node-RED dashboard, the nodes that can be added are visible on the left-hand side.
For the realisation of the project we need to add a "serial in" and a "debug" node. Then the nodes are connected to each other. -
Then double-click on the "serial in" node and rename it to "Scanner".
Then define the serial port. -
Change the port as follows and accept it:
-
Check if the "Scanner Node" is connected (when the green light is on). Then execute the Node-RED Flow by pressing the "Deploy" button. From now on, the scanner is online and you can scan.
- Now it is possible to read the barcode using the barcode scanner. To do this, we read in the example barcode "Hello World" from the chapter "Scanner Configuration". It can be seen that the interpretation of the barcode is now displayed in Node-RED:


B) Realisation with PLC
- Open the PLC App using the ctrlX Works interface.
- When the PLC programme has opened, create a new project. Make sure that the PLC app is connected to the ctrlX CORE.
- Download the PRG_Barcode_Scanner.xml file attached to this How-To.
- Import the file PRG_Barcode_Scanner.xml into the PLC App.
-
Drag the program "PRG_Barcode_Scanner (PRG)" from "Application" into the "Task Configuration" of the PLC App.
- Add the "SysCom" library. To do this, double-click on "Library Manager", then click on "Add Library" and use the search function to find and add the "SysCom" library.
- Repeat the process and add the library "CmpSettings".
- Generate the code of the programme. Check that there are no error messages. Otherwise, correct the error messages.
- Press the "Login" button.
- After logging in, check that the "iState" in the programme corresponds to "0". Then press the "Start" button.
Note: Playing "Case 0" opens/configures the port. - Then save the project and restart the ctrlX CORE (to complete the configuration of the port)
- When the restart has been completed, open the PLC project via the ctrlX WORKS interface (make sure that the PLC project is connected to the ctrlX CORE).
- Log in to PLC App again (as in step 9)
- In the PRG_Barcode_Scanner programme, change the "iState" from 0 to 1. To do this, double-click on the red box next to "iState". Then a new window opens and replace the 0 with a 1. Then accept this with "OK".
- Press the key combination "Ctrl" + "F7" to write the values online.
- Press the "Start" button to run the program.
- Now it is possible to read the barcode using the barcode scanner. To do this, we read in the example barcode "Hello World" from the chapter "Scanner Configuration".
It can be seen that it displays the barcode in the PLC as decimal - ASCII:


Hint: If the scanner is reconfigured, the ctrlX CORE must be restarted.
Notes
- Depending on the supplier integration, the device port can differ between "/dev/ttyACM" and "/dev/ttyUSB0". This needs to be checked for each device.
- To check at which port address the device is connected use the ctrlX OS web UI: Logbook -> Enable System Messages -> search for "tty"

You must be a registered user to add a comment. If you've already registered, sign in. Otherwise, register and sign in.