
- Subscribe to RSS Feed
- Mark as New
- Mark as Read
- Bookmark
- Subscribe
- Printer Friendly Page
- Report Inappropriate Content
Overview
This blog will show you how to test your ctrlX PLC Applications using the CODESYS Test Manager.
CODESYS Test Manager
Testing the PLC program code itself. Possibility to create automated tests without any programing-skills and with the use of dialog windows. Effortless integration into PLC Engineering Tool. But needs a special license.
Download the Test Manager and install the package using the package manager of ctrlX PLC Engineering. In order to activate the license for the Test Manager you have to reenable the CodeSys license manager in PLC Engineering or use the online license activator of CodeSys. After that you can open the test manager within PLC Engineering.

Test Script with dialog windows
- Prepare a PLC project you want to test or download the example project, by clicking here. The example project implements a simple statemachine.
- Create a new test script for the PLC project and give it a name.
Create Test Script
- Set a base path variable, otherwise the test manager will throw an error if you try to load a project from the disk.
Add Assignment
Variable BasePath
- Add a test case, where the preparations for the actual tests can be done. Add actions to close an open project, load the project you want to test, set the correct application, log into the ctrlX CORE and start the application.
Add Test Case
Add Action
Add Action: Close Project
Add Action: Close ProjectAdd Action: Load Project
Add Action: Load ProjectAdd Action: Set Application
Add Action: Set ApplicationAdd Action: Login and Start
Add Action: Login and Start - Actual testing of the PLC application: For each test case, you can use the corresponding actions to test the application. In this example, each state of the statemachine is tested. The only actions used are CompareVariable and WriteVariable.
Action: CompareVariable - check initial stateAction: CompareVariable - check state after initialization is standbyAction: WriteVariable - creating a raising edgeAction: CompareVariable - state changed to producingAction: WriteVariable - stop buttonAction: CompareVariable - check state is stoppedAction: CompareVariable - check state is standbyAction: WriteVariable - simulate error occurrenceAction: CompareVariable - check error stateAction: WriteVariable - clear the errorAction: CompareVariable - check state change to initialAction: CompareVariable - state is again standby - Cleanup: Reset the application, logout and close the project
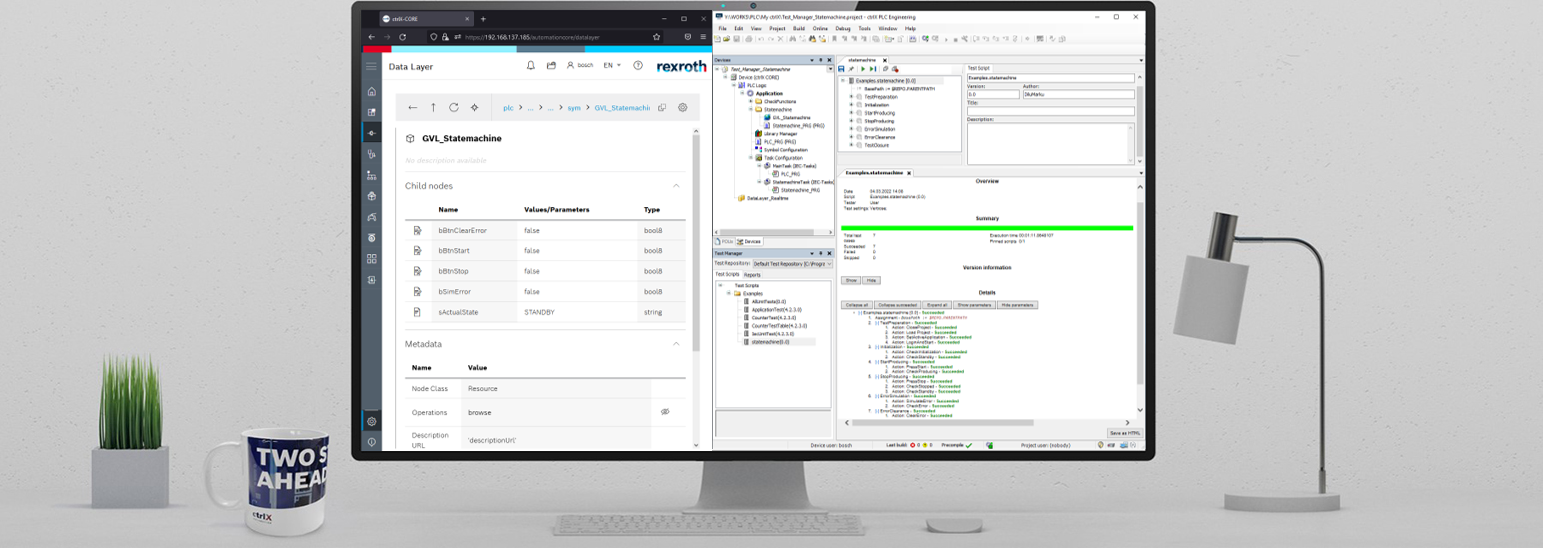
Action: ResetApplication - reset applicationAction: Logout - log out of COREAction: CloseProject - close the project - Test execution: Save the test script and press on the green play button to execute the full test script. In the popup window, you can enter your name if you want to, just make sure the option "Create verbose report" is marked to get the full report and press start. While the test is running you can follow each step in the popup window and see the test progress.
Test Progress
- Test Report: Here you will see the results of the test. You could save it as an HTML file as well.
Test Report


You must be a registered user to add a comment. If you've already registered, sign in. Otherwise, register and sign in.