
- Subscribe to RSS Feed
- Mark as New
- Mark as Read
- Bookmark
- Subscribe
- Printer Friendly Page
- Report Inappropriate Content
Step-by-Step guide
Step 1: Create your own localization sheet
If your language is not available within the default languages in WebIQ, you can create your own localization sheet. First things first, go to Localization Manager.
The available languages in WebIQ are German and English, but you can add as many as you want.
To add a new language, click on the “+” button.
Assign a name to the language you want to add and click on Create.
In the table, all variable names, text strings and messages in their own default language are displayed. To translate them on your language, all you have to do is select the variable name you want to translate, write its translation in the “Localized Text” field on the right side of the page and click on the Apply button.
Note: if you click on the checkbox shown in the picture below, all system text strings are displayed in the translation table and can be translated as well. System text strings contain widget captions, system messages, etc.
You can now export your own localization sheet by clicking on the “Import/Export” button. You can select the format you what to export you file to (JSON and CSV formats are available). Once your localization sheet is exported, it can be imported and used in different projects without translating it again.
Step 2: Create a button enabling translation on the HMI
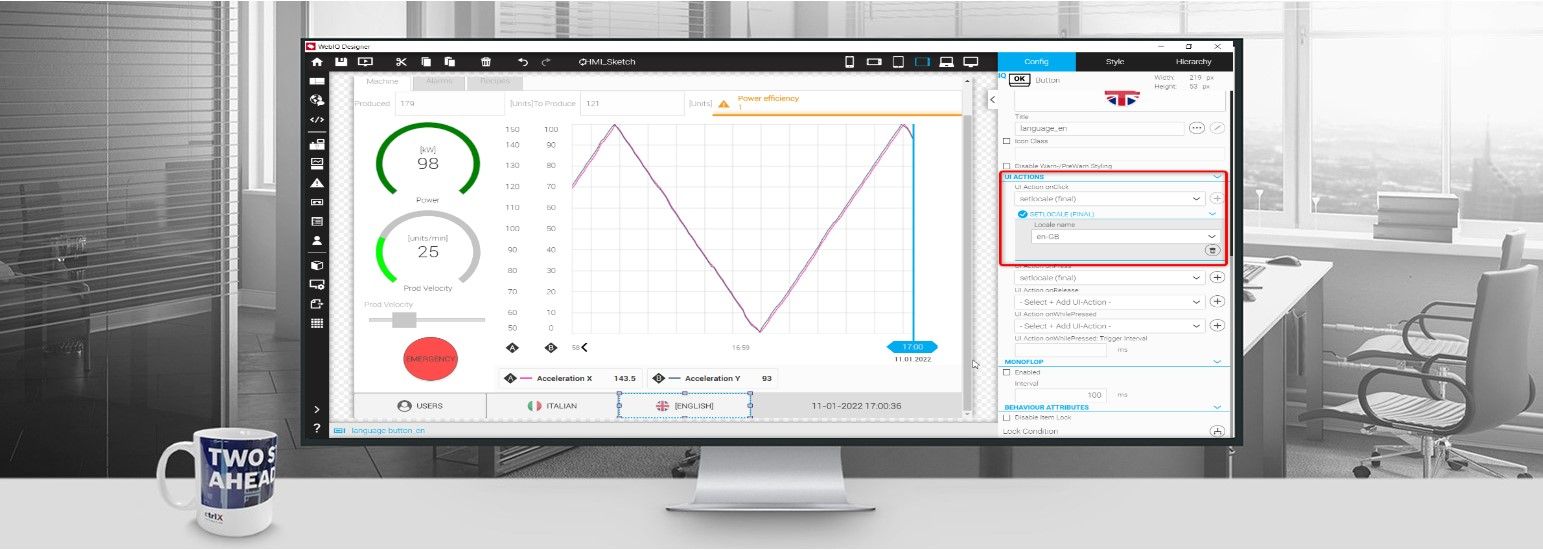
If you want a button on you HMI enabling translated in a different language, you can just add a simple button from the widget list. From the Config tab of the button, scroll the screen up to UI ACTIONS section.
For the “UI Action OnClick” action, select “setlocale (final)” action from the dropdown menu.
Then press on the “+” button the right side of the field.

Now select the language you want to translate your HMI to by clicking the button you’ve just created.
It should look like this.
Now you have a multiple language HMI.
The Company
Empowering HMI Excellence
Smart HMI is a team of experts for the development, enablement and integration of 100% Web-Technology based Software, which empowers every customer to easily create future-oriented industrial HMI solutions. The Software Platform WebIQ – developed by Smart HMI -is a 100% Web-Technology based, forward-looking Visualization-System with comprehensive Design-possibilities to create industrial Web HMI’s.

You must be a registered user to add a comment. If you've already registered, sign in. Otherwise, register and sign in.