
- Subscribe to RSS Feed
- Mark as New
- Mark as Read
- Bookmark
- Subscribe
- Printer Friendly Page
- Report Inappropriate Content
Disclaimer
The goal is to be able to run the examples for python in the SDK and start to program in minutes. This solution requires no particular app installation and no build environment on PC.

Requirements:
- ctrlX CORE - x3 or x7 or a ctrlX OS installation
- IDE app
- Python runtime app
STEP 1: download the sdk, unzip it and upload the examples
Navigate to ctrlX AUTOMATION SDK repo and download the full repo as a zip. LinkToRepo

Open the "IDE - TextualCoding" app.
Extract the folder, drag&drop the folder samples-python in the "active-configuration" folder.

STEP 2: start the examples, brief explanation of the most important examples
Lets start to run the most easy Example: "datalayer.client.light". For any example we have a main.py and we can start the file by clicking the "play" button. Once we're done we can stop the file stopping the terminal clicking on the X. Easy!

Willing to start from 0 playing around with the SDK I, personally suggest to go over following this sequence:
- Sart from "datalayer.client.light", is the most easy example with this we can start to interact with the datalayer, read data and subscribe to Datalayer nodes.
- Understand how to create nodes with "datalayer.provider".
- Continue with "datalayer.client" to understand How to Use Variant type to write nodes.
- Fill the competences over Flatbuffers and provider features 🙂
STEP 3: let's start this Journey together
The datalayer.client.light example
Note: The code has been a little shrinked from comments to better fit in page. Starting with this example is very simple, the code starts importing the needed libraries and modules:

The main starts with the initialization of the Datalayer system, the first two lines of code are mandatory. The third line of code reacts differently if we're inside a snap or outside. In a snap we're using the ipc communication (so ip and ssl_port are ignored) and the system works out of the box. (the password and user box are omitted in this example but can be specified).
If we pass these lines of code the system is good and we can then start.

The example continues with the subscription part: the subscription has to be set with the various parameters and then created and linked to a subscription function that is then called anytime there is a notify event from Datalayer. In this example we're subscribing with a 2s interval to the cpu usage of the core.

The function prints the result of the notification with the timestamp.

FInally we see the synchronous read function which is "read_sync".

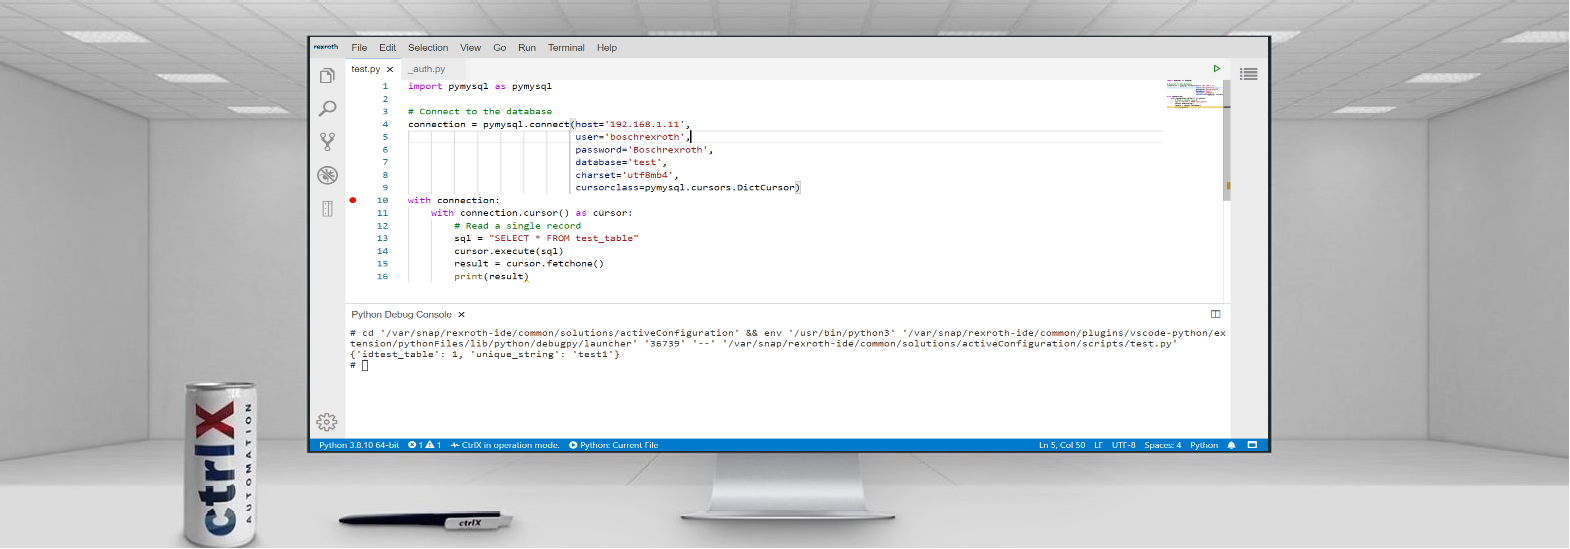
Running the code, this is the code output:

The datalayer.provider.all-data example
NOTE:
At the time that I write this guide the code has 2 simple bugs, i am attaching the "nodeManagerAllData.py" file that fixes the bugs. Please substitute this in the example.
The structure is the following:
- the alldataprovider folder contains the code in nodeManagerAllData and the providerNodeAllData class that is used.
- The main.py is triggers all the functions.

The code creates some dynamic (editable) and static (non editable) nodes in the datalayer:

Mixing Up the examples
Now lets think that we want to create a datalayer node which is called "Powermeter" and contains two nodes which are "PowerDevice1" and "PowerDevice2" which contain the powers measured reading two analog ethercat inputs and multiplying them for a factor. We'll keep the things simple. We're going to modify the two examples and run them separately.
Starting from the provider part: we need to modify in main.py, example datalayer.provider.all-data the address_root in two positions: line 16 and line 51. Plus we comment out the "create_static" part. Dont' forget to save both files!

Here we have the second part to modify in main.py

Then we move to nodeManagerAllData.py and we remove the "dynamic" subnode since we don't need it:

Then we modify accordingly the create_nodes function:

The Result of this code from datalayer point of view is the following:

We continue then with datalayer.client.light but before we stop the previous script and we start it in a separate terminal, in this way it will continue to run independently

Modifying the main.py we remove the subscription and flatbuffer parts obtaining a super easy example.

In this way any 2 seconds we read the memused-percent and we print the result. Since we have to read a uint16 and we need to write it multiplied by a value as a float32 we modify the example introducing the writing part:

In the end the programs reads the ethercat analog input and writes a calculation on the PowerDavice2 node.


You must be a registered user to add a comment. If you've already registered, sign in. Otherwise, register and sign in.