
- Subscribe to RSS Feed
- Mark as New
- Mark as Read
- Bookmark
- Subscribe
- Printer Friendly Page
- Report Inappropriate Content
How to configure the ctrlX OPC UA Pub/Sub App to talk with a Siemens S7
This article is about some special settings you need to make to get OPC UA Pubsub between a ctrlX CORE and a Siemens S7 running.
It does not cover each detail of a pubsub configuration.
We used a example program for the Siemens S7 which you can download from the Siemens website, see link below.
Prerequisites
- Siemens S7 controller with OPC UA Pubsub possibility.
c2c-communication-via-opc-ua-pubsub-with-simatic-s7-1500-on-the-basis-of-udp - ctrlX CORE with OPC UA PUB/SUB App min. Version 1.20
- UaExpert min. Version 1.7.0
https://www.unified-automation.com/downloads/opc-ua-clients.html
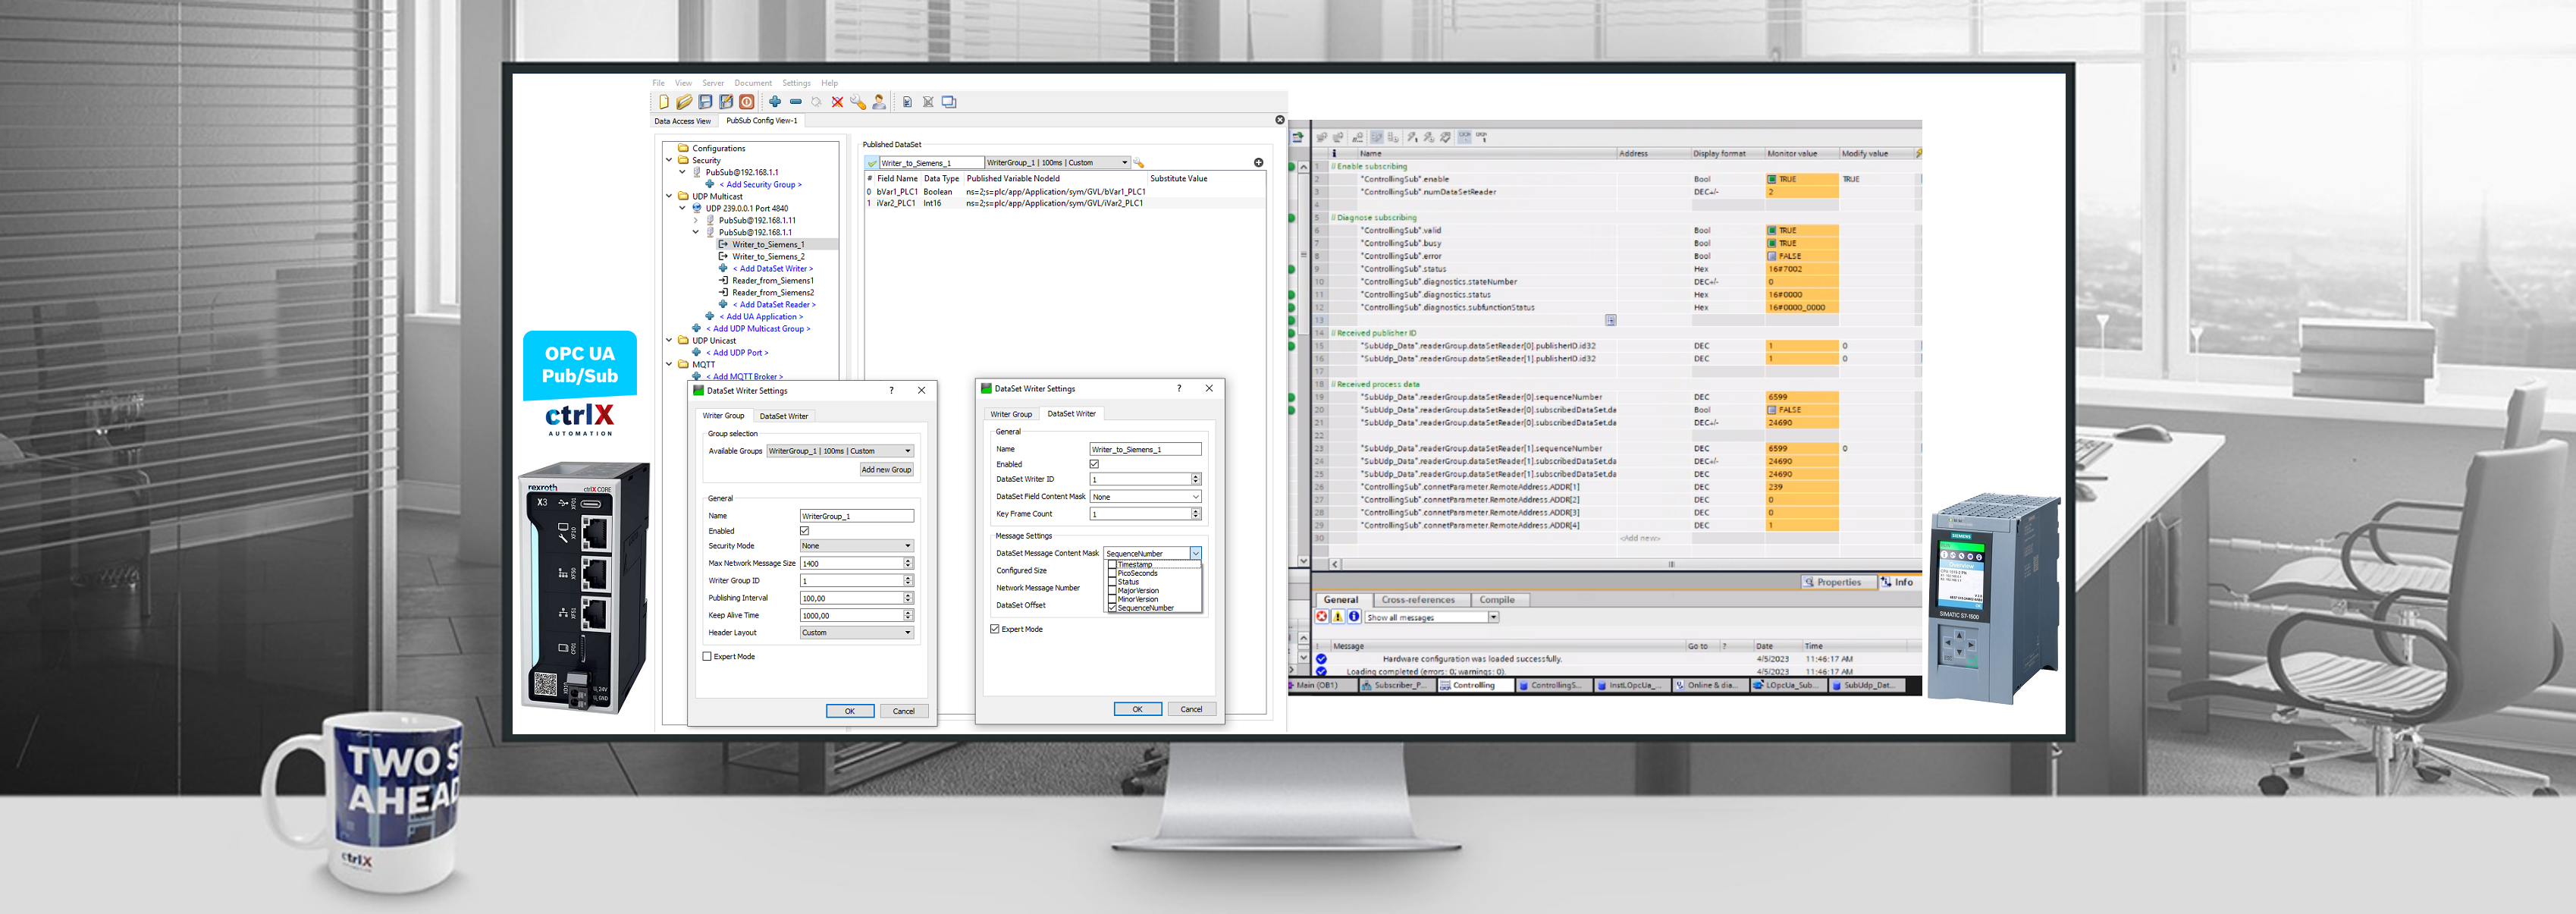
Settings which have to fit together between ctrlX and Siemens:
- "Publisher ID" (Unique ID per device)
- "Dataset writer ID" (Unique ID per publisher)
- Variablenames are not relevant
- Datatypes have to fit in type and order between publisher and subscriber
The header coming from the Siemens S7 contains in "DataSet Message Content Mask" just the "SequenceNumber"
They also cannot receive additional information in there, this has to be adopted on ctrlX side, see below
Step-by-Step guide ctrlX as publisher
Step 1: General settings
Set the Publisher ID as a UInt32, and the interface from the ctrlX your message should leave:

Step 2: Customize your "Dataset Message Content Mask"
Siemens sends and accepts only the "SequenceNumber", so you have to adjust it on ctrlX side.
Select "Header Layout" Custom, change the tab and just leave the tick "SequenceNumber".
Configure by drag and drop all variables you need and you expect on Siemens side.

Step-by-Step guide ctrlX as subscriber
Step 1: Create a dummy publisher with all datatypes in the right order you will get from siemens
Create a dummy publisher in ctrlX with all datatypes you would get from the Siemens. (Add DataSet Writer).
This can also be on the same ctrlX and can be deleted when finished.
Drag and drop all dummy data in to have the same allignment, types and size for your process data which is coming from Siemens.

Step 2: Create your Reader
From the dummy, create your DataSet Reader with "Add DataSet Reader".
Adjust the values marked in the screenshot so it fits to your Siemens configuration.

Related Links

You must be a registered user to add a comment. If you've already registered, sign in. Otherwise, register and sign in.