
- Subscribe to RSS Feed
- Mark as New
- Mark as Read
- Bookmark
- Subscribe
- Printer Friendly Page
- Report Inappropriate Content
MongoDB is an open-source NoSQL database system designed for handling large volumes of data. It stores data in flexible, JSON-like documents using a format called BSON. MongoDB is known for its scalability, high performance and support for dynamic data models. It is widely used in applications that require efficient storage, retrieval, and manipulation of data, such as content management systems and real-time analytics. The database supports ad hoc queries, indexing, and has a powerful aggregation framework for data analysis.
For these reasons, its use in the ctrlX Ecosystem can really power up your applications.
In the following picture you can see what the system structure looks like:
This project targets the current generation ctrlX COREvirtual, ctrlX CORE X5, ctrlX CORE X7, and ctrlX OS on a IPC when running ctrlX OS 2.xx (base apps running an ubuntu core 22). This application is (and will be) only supported for amd64 architectures as explained in the attached .zip. Therefore, Mongo DB 7.0 cannot be ported to the current generation of ctrlX CORE X3 with a 4 Bit Quad-Core ARM CPU, in particular with arm64:v8.0.
The functionalities shown in this How-to have been tested in ctrlX COREvirtual and in ctrlX CORE X7. This guide is simply a demo example, feel free to keep playing with it !
1. Installation
In your Engineering PC you need to download Mongo DB Compass, you can do it from the official Mongo DB website. Choose your operating system. The functionality shown in this How-to has been tested in Windows 10 and Ubuntu 22.04 as host system in the Engineering PC.
Install the MongoDB runtime in your ctrlX CORE. You need to compile it youself following the instructions that you can find in the attached .zip. (ctrlx_mongodb-main.zip)
2. Configuration
2.1. General settings
If the MongoDB runtime was successfully installed in your CORE. You will find a folder called "Mongo DB" in the persistent data, i.e. "Manage app data" section.

Inside you will find three items:
- mongodb: the actual data server where the data is stored. In this example the data is stored locally in the CORE, however this can be easily changed as we later will see.
- mongodb.conf: config file for the Mongo DB runtime. You can download the app data (appdata.zip), modify this file and upload it again to the CORE. By doing this, one can change the configuration of Mongo DB.
- mongodb.log: log messages about the state of the Mongo DB runtime.
Now, let's have a closer look at mongodb.conf. Most of the options are left commented, if you want to know what they do, please refer to the official documentation of Mongo DB. I want to highlight a couple of things that you may want to edit:

- dbpath: specify where the data server will be hosted. For example, if you have an storage media mounted in your CORE, you could specify this path. See section 2.2 where more details about this are given.
- logpath: where the log file will be generated
- bind_ip = 0.0.0.0.0, it means the daemon will explore all the ip address in the local network
- port: specify the port from which the runtime can be externaly accessed (important for Compass)
I recommend you to keep the configurations like this the first time, and you try to modify them later. It is possible to add user and password to access to the data base.
2.2. Configure an external storage media
If you want to store a great amount of data, it is advisable to do so in a external storage media and not in the interal memory of the ctrlX CORE. In the following, I will present how to configure a external media storage device in ctrlX CORE X7. (Speaking about external media does not make sense in ctrlX COREvirtual)
ctrlX CORE X7 supports both USB-Flash Drives on the XF10A/B/C ports and micro-SD card on CF01 port.
First, make your external media a single GPT partition, formated with FAT32. You can learn how to do it in the following How-To.
Plug the device in the ctrlX CORE and navigate to the storage page (Settings>Storage). You should see the external media device together with the local "System Data".

The click on the triangule on the right upper corner of the external media to mount the filesystem. You will prompted with the following.

Select "For data exchange" if you do not want to encript the data, i.e. it could be eventually read from outside (e.g. another ctrlX CORE), otherwise, if you want this ctrlX CORE to be the only one able to read the data, select "To extend system data".
After this step, the external media is ready to be accesed by the different snaps. Actually, for a snap to have access to the external media device, it must include the "removable-media" plug (see the snapcraft.yalm file for more details). Although this plug is not generally connected in a snap, in the case of ctrlX OS, it is connected, so no further steps are neccesary.
Now you can modify the "mongodb.conf" file and state that the database should be stored in the external media.

NOTE: if you want to store in a sub-folder in the media device, you must manually create it (i.e. include a mkdir command in the hook that runs at the app booting, or use a ssh connection to access to the system memory)
3. Connect Compass with ctrlX OS
Connect the Engineering PC and the CORE in the same network. If you are using ctrlX COREvirtual, do not forget to fordward port in which the runtime is accesible (27017).

Open Compass and check your connection string.

In our case the ctrlX CORE virtual, the IP address is localhost (127.0.0.1), and the port is the default one. If you are using a real ctrlX CORE, the IP address is 192.168.1.1. by default. Adapt it depending on your setup. There is no user/password to access the data base by default.
If the connection does not work, in some cases the connection to that IP is protected. You can try with SSH connection with password (open advanced Options) if you have that feature enabled in your device (in virtual it is enabled by default). Probably you will not need SSH again, only the first time. New updates of this How-to will address this issue.

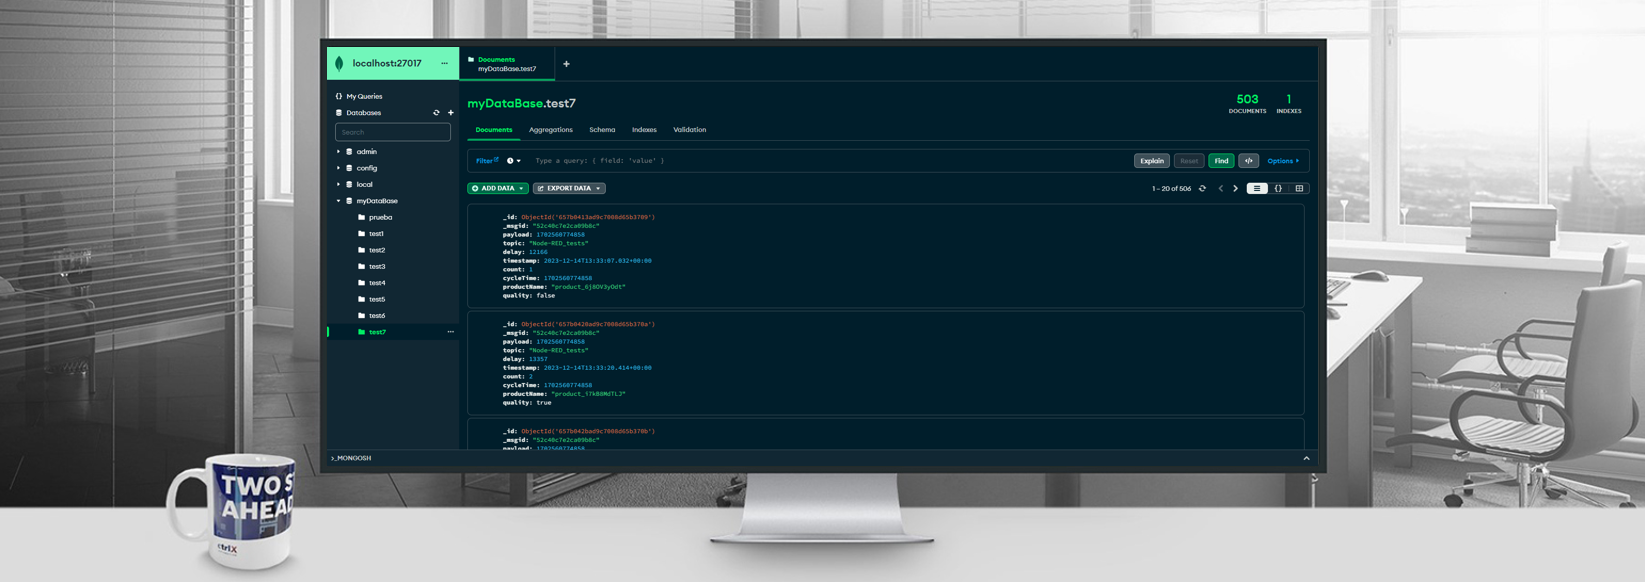
If you are able to connect, you are able to visualize your data. It should look like this:

4. Test to publish something to Mongo DB using Node-RED
There exists a Node-RED palette to communicate with Mongo DB. You can download it as seen in the following images. The CORE must be connected to the internet.


We have prepared some examples to publish to the data base from Node-RED. Find them attached to this How-to (flows_mongoDB.zip). To import it, open the "Flow Editor" from Node-RED and proceed as shown in the following pictures:


You must import both flows (.json) in that .zip:
- Products: Working in the background, you do not need to interactuate with this. It simulates a product object that would be later publish to the database.

- mongoDB: It allows you to publish cyclicly a product object. Likewise, we have setup a functionality to read objects from the database.

Once you have published something, you can go to Compass, refresh it, and see they data you published.
You can also export the data in a csv or json object, following what is shown in the next picture:

Have fun!

You must be a registered user to add a comment. If you've already registered, sign in. Otherwise, register and sign in.