
- Subscribe to RSS Feed
- Mark as New
- Mark as Read
- Bookmark
- Subscribe
- Printer Friendly Page
- Report Inappropriate Content
Introduction
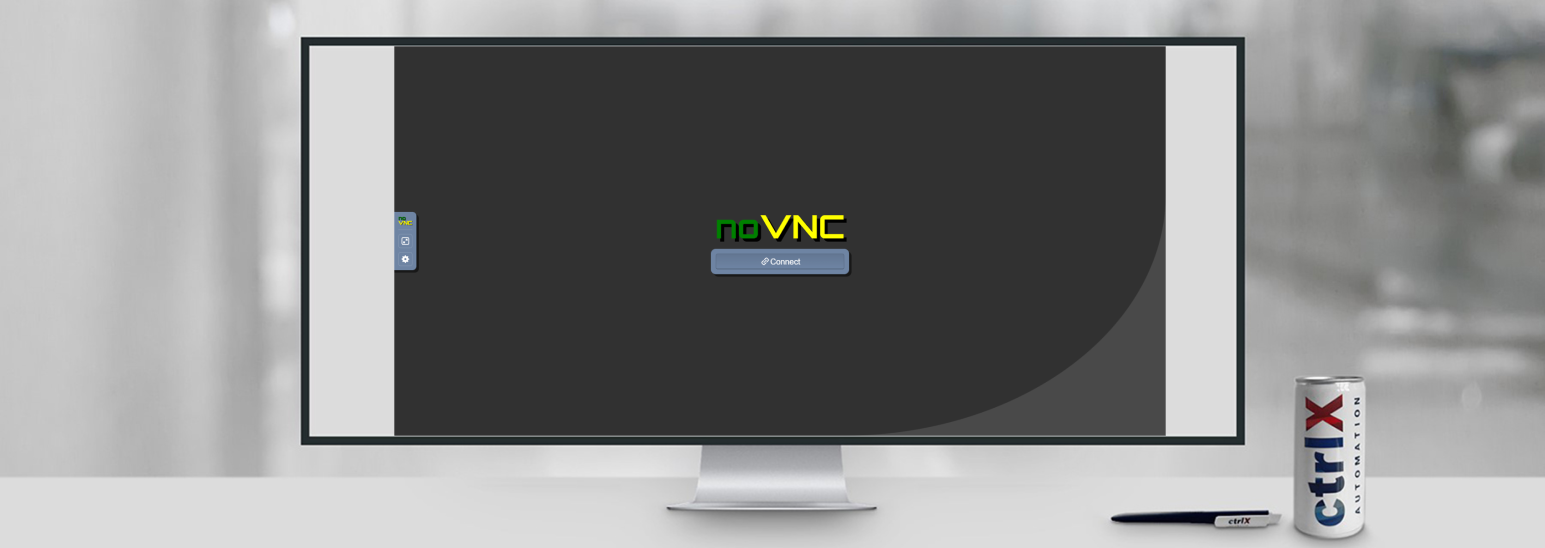
In this article, it will be shown how to build a noVNC snap. NoVNC is a HTML client which allows to connect to a VNC server from a browser. As noVNC is a HTML file along with several JavaScript and CSS files, it is required to launch them with a program. This program is called Websockify and it basically creates the noVNC website. Additionally, it also helps noVNC to communicate with the VNC server as noVNC only understands WebSocket. Websocket is a communication protocol which allows to establish a bidirectional communication between client and server. Comparing it to HTTP where it is only unidirectional and the communication is closed after each request, WebSocket allows to have unlimited number of requests and responses. This persistent data stream make this communication a much faster option compared to HTTP.

To start noVNC it is required to start websockify first. Websockify is programmed in Python and noVNC with JavaScript and HTML. With the original noVNC program it is required to start it by the terminal introducing the html directory of noVNC, the VNC server IP address and port, and the local port that will be used to establish the connection both devices. To be able to introduce this data and avoid the user to open a terminal, a webserver will be programmed where it will be possible to introduce the required data and with that information start automatically the app. All this will be packed in a snap compatible with the ctrlX CORE.
Prerequisites
- ctrlX Works
- App build Environment configured
Development
The app basically consists of four different programs that run simultaneously:
- noVNC which execute JavaScript, css and HTML files
- Websockify which execute Python files
- Flask webserver which execute Python files
- Active configuration which execute bash files
Step 1: Download noVNC and Websockify from GitHub
Download the zip files from GitHub and extract them in a reachable folder
Step 2: Create project folder in the App build environment
Note: In the case the user does not know how to configure the app build environment, please check the following tutorial
- Enter the app build environment and create a new folder.

- Introduce the downloaded files in the new created folder.
For that, first drag all the noVNC files into the main folder as shown below:

Secondly, change the websockify folder name to "websockify", to simplify the access to that folder later on, and copy the folder in the main project folder.

Step 3: Introduce the Flask webserver and configuration files in the project folder
These files can be obtained from the zip file provided at the end of this article.
- Drag the "flask_webserver.py" and the "setup.py" file and the "dependencies" folder into the "websockify" folder

- Drag the "configs" folder into the general project folder

- Drag the file and folders inside the snap folder into the "snap" folder

Accept the "Replace" messages as the internal files have to be replaced.
- Check that all the added folders are in the project:

Step 4: Create snap
- First the user must be located in the project folder
- Press "File" --> "Open folder"
- Select the folders until selecting the main project folder
- Press "Ok" and the folder will be opened

- Press "Terminal" and open a "New terminal"

- Make files executable
To be able to succesfully build the snap, it is required to make some bash files executable because otherwise the following messages will appear for the different files:

- In the terminal, with the "cd" command, access the snap/local folder where the svc_wrapper.sh file is located:
cd snap/local
- Next, use the "chmod +x" command to make the file executable:
chmod +x svc_wrapper.sh
- Return to the main folder using the command "cd .." twice:
cd ..

cd ..
- Perform similar steps for the novnc_proxy file:
cd utils

chmod +x novnc_proxy

cd ..
- Perform similar steps for the run.sh file:
cd configs

chmod +x run.sh

cd ..

- Build the snap executing the "snapcraft --destructive.mode" command:
sudo snapcraft --destructive-mode --target-arch=arm64 --enable-experimental-target-arch
Note: This command is for generating an arm64 compatiable snap. In the case the user, wants to create an amd64 snap just change arm64 with arm64
- Clean the directory using the "snapcraft clean --destructive-mode" command:
snapcraft clean --destructive-mode
Overall explanation
The snap file cosists of the required files for running noVNC, Websockify, Flask webserver and configuration files for the ctrlX CORE interface.
noVNC
It consists of HTML, JavaScript and CSS files where it is not necessary to perform any change. Basically, the HTML files access to the JavaScript files for all the dynamic behaviour of noVNC and the CSS files are used for the visualization of the noVNC interface. The noVNC files are located in the following folders:
- app
- core
- snap/hooks/configure
- utils
- vendor
- HTML files
In the yaml file it is required to define the following sections to be able to install novnc and make it work properly:
- apps: novnc defining command and plugs, novnsvc for the same purpose
- parts: novnc where all certain files and folders are copied to the main snap file. Additionally, with novnc-deps, other novnc dependencies are also copied with the same purpose. Finally, svc-script and svc-script-deps perform similar tasks
- hooks: configure to define correctly the novnc hook configuration file
Websockify
It consists of several Python files and inside the websockify folder all the webserver files will be introduced. On the other hand, it is not required to perform any change in the Websockify files. Basically, Websockify is started with the VNC server IP address and port, local port and IP address if desired, and with which HTML file. There are other many functions, but these are the inputs that are required to give to Websockify to be able to start.
In the yaml file it is required to define the following sections to be able to install websockify and make it work properly:
- parts: websockify where the Python plugin is defined and the required packages are defined
Webserver
It consists of Python and HTML files. The required folders and files required to run the webserver are located here:
- websockify/flask_webserver.py
This is the main Python file which starts Flask and imports all the required files required to create the webserver
- websockify/setup.py
This is the configuration file required to setup Python in the snap. Here the main is defined, the Python modules are defined so that they are downloaded and installed in the snap and other descriptions are described in this file.
- websockify/dependencies/static/image
In this folder the image used for the webserver interface is located
- websockify/dependencies/Target/target
In this folder the file used to store the VNC server IP address and port is located
- websockify/dependencies/Target/templates/index.html
Here, the index.html file is found and is used by Flask to create the web interface
In the yaml file it is required to define the following sections to be able to install Flask webserver and make it work properly:
- apps: websockify: where the main Python command is defined, a "simple" daemon is used so that the file is always executed, and all the required plugs are defined.
- parts: the websockify plays here also a role because it includes the Flask webserver files. Additionally, with flask-dependencies, the files required for the webserver to run, are copied to the /bin folder so that flask_webserver can work properly.
ctrlX CORE interface
On the one side, it is required to define menus and sidebar to be able to access to the Flask webserver interface and to the noVNC visualization. To be able to define this, the novnc.package-manifest.json file is used. This file is located in the configs/package-assets folders.
On the other side, the active configuration has to also be configured. This configuration gives the option to store and write files internally in the ctrlX CORE. To be able to achieve this it is required to create several files and perform some configurations in the yaml file. The required files are located in the following directories:
- configs/run.sh
This bash file creates a noVNC directory in the active configuration folder and checks that the Target directory is created and in the case it is not, it creates it and copies the target file to the directory. Note: To be able to run this bash rile it is required to define it in the yaml file
- snap/hooks/connect-plug-active-solution
This file creates a novnc folder in the active configuration folder in the ctrlX CORE.
- snap/snapcraft.yaml
On the parts section it is required to add the following lines:
parts:
    activeconfiguration:
        source: ./configs/
        plugin: dump
        organize:
          '*': bin/
hooks:
    connect-plug-active-solution:
        plugs: [active-solution]
plugs:  #Plug to give the novnc snap access to the active configuration. This habilitates the snap to read the memory
    active-solution:
        interface: content
        content: solutions
        target: $SNAP_COMMON/solutions
apps:
    activeconfiguration:
        command: ./bin/run.sh
        daemon: simple
        plugs: [network, network-bind, active-solution]    # <-------------------------------
    websockify:
        command: ./bin/flask_webserver.py
        daemon: simple
        plugs:
            - network
            - network-bind
            - active-solution                             # <--------------------------------
Related links

You must be a registered user to add a comment. If you've already registered, sign in. Otherwise, register and sign in.