- Subscribe to RSS Feed
- Mark as New
- Mark as Read
- Bookmark
- Subscribe
- Printer Friendly Page
- Report Inappropriate Content
- Introduction
- Prerequisites
- Configuration
- Step 1: Download Key Value Database App
- Step 2: Install Key Value Database App on ctrlX CORE
- Step 3: Download and install Node-RED App
- Create a flow in Node-RED
- Step 1: Open Node-RED
- Step 2: Create a flow
- Explanation about choosing methods and path
Introduction
Throughout this article, you will get a step by step description of how to create a new implicit Data Layer node from Node-RED using the Key Value Data Base App.
Prerequisites
Configuration
Step 1: Download Key Value Database App
At the bottom of the Key Value Database App description in ctrlX Store you can find a section as shown in the screenshot below, where you can get the app and its license.

Step 2: Install Key Value Database App on ctrlX CORE
After downloading the file, we need to access the ctrlX CORE web interface. Check out this Quick Start Guide. Watch this YouTube video tutorial on how to install the app.
Step 3: Download and install Node-RED App
You can download and install Node-RED App in the same way we did for KVD app. To get to know more functionality about Node-RED please refer to this GitHub page.
Create a flow in Node-RED
Step 1: Open Node-RED
One can open a Node-RED via ctrlX CORE web interface as shown in the picture below.

Step 2: Create a flow
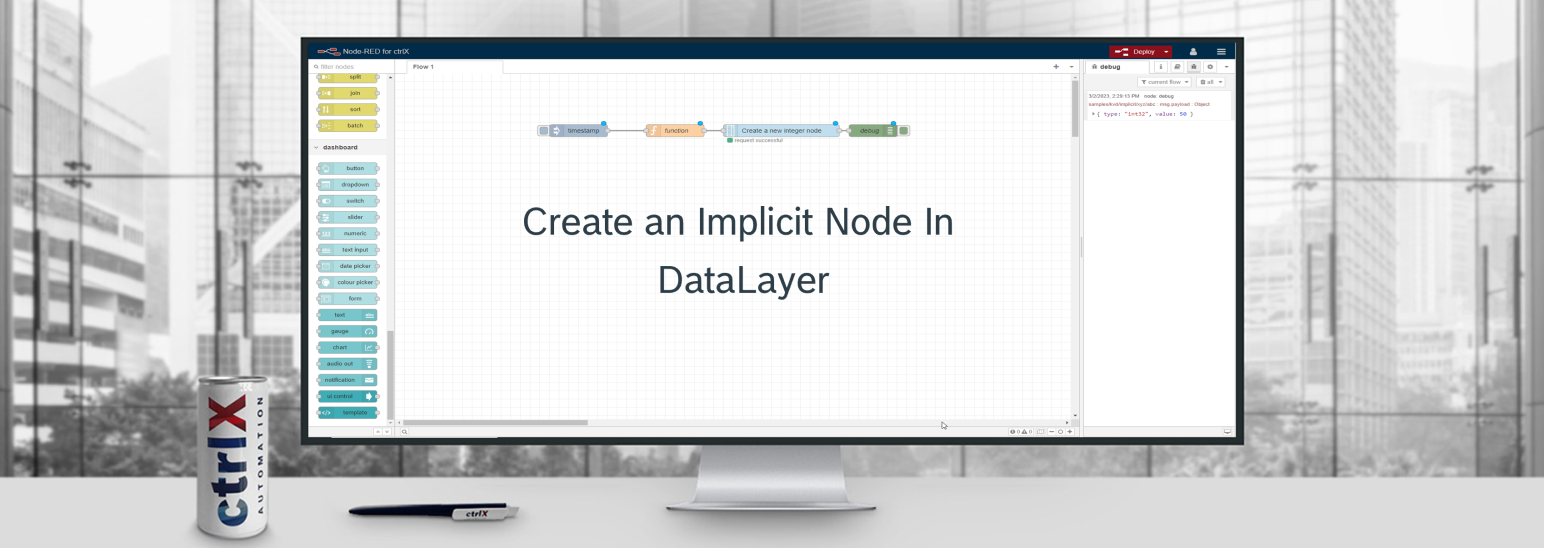
Click on the button 'flow editor' in the Node-RED dropdown menu in the sidebar and it will pop-up a new tab of Node-RED for ctrlX in your browser.
There are two options for creating the desired flow in Node-RED
Option 1: Just copy the code below in the import option, which can be found on the right side menu button as shown in the picture below or simply press ctrl+i.
In this import dialogue box copy the code below. the flow will be automatically generated after importing the code. More information about 'Import-Export of flows' can be found in this YouTube tutorial.
[
{
"id": "82282753db553715",
"type": "inject",
"z": "f04e731774fc039c",
"name": "",
"props": [
{
"p": "payload"
}
],
"repeat": "",
"crontab": "",
"once": false,
"onceDelay": 0.1,
"topic": "",
"payload": "",
"payloadType": "date",
"x": 320,
"y": 180,
"wires": [
[
"3ef625bef274f06c"
]
]
},
{
"id": "b44320cd0f26b4cc",
"type": "ctrlx-datalayer-request",
"z": "f04e731774fc039c",
"device": "c4dd1202caa979a1",
"method": "WRITE",
"path": "samples/kvd/implicit/xyz/abc",
"payloadFormat": "value_type",
"name": "",
"x": 330,
"y": 300,
"wires": [
[
"12a27f6d2313a243"
]
]
},
{
"id": "3ef625bef274f06c",
"type": "function",
"z": "f04e731774fc039c",
"name": "function 4",
"func": "const data = {\n type: 'int32',\n value: 50\n}\nmsg.path = 'samples/kvd/implicit/xyz/abc';\nmsg.payload = data;\nreturn msg;\n",
"outputs": 1,
"noerr": 0,
"initialize": "",
"finalize": "",
"libs": [],
"x": 320,
"y": 240,
"wires": [
[
"b44320cd0f26b4cc"
]
]
},
{
"id": "12a27f6d2313a243",
"type": "debug",
"z": "f04e731774fc039c",
"name": "debug 4",
"active": true,
"tosidebar": true,
"console": false,
"tostatus": false,
"complete": "payload",
"targetType": "msg",
"statusVal": "",
"statusType": "auto",
"x": 320,
"y": 380,
"wires": []
},
{
"id": "c4dd1202caa979a1",
"type": "ctrlx-config",
"name": "localhostsub",
"hostname": "192.168.1.1",
"debug": false
}
]
Option 2: You can manually drag and drop nodes, like shown below.
1. Inject node from common
2. Function node from function
3. Data Layer Request node from ctrlX AUTOMATION
4. Debug node from common
Insert the above nodes into the environment and connect them.

In this flow, we only need to configure two nodes
1. Configuration of Function Node
After double-clicking on the function node a dialogue box for "Edit function node" will open, in which you can type in code as shown in the screenshot below and then click on the "DONE" button. in the picture below data, the variable represents which kind of variable we want to create, in our case it will be an integer.

2. Configuration of Data Layer Request Node
By double clicking on the data layer request node a dialogue box for " Edit data layer request node" will open.
First thing is to configure a device for that. Click on the "pencil" icon, a properties dialogue box will open as shown below. Enter the respective data about username and password and click on "update".

Now we have configured the device and we are back to "Edit data layer request node". Enter data as shown in the screenshot below and click on "Done" and the flow is ready to deploy.
note: If you have already define msg.path in function node then you are not required to define it in picture below.

Explanation about choosing methods and path
The Key Value Database app acts as an easy to setup NO-CODE data provider for the ctrlX CORE with high-performance persistence.
We can configure dynamic (virtual implicit) nodes via client by using a wildcarded root node.
There are two kinds of Implicit root nodes as highlighted in the picture.

Basically, with an implicit root node we can create nodes on all hierarchical levels(samples/kvd/implicit/**) but with implicit_one_level creation is allowed only on the next hierarchical level(samples/kvd/implicit_one_level/*). In my example, I have used an implicit node and created abc child node within xyz.
And it only supports 'create-on-write' (Method CREATE not allowed), which creates a variable when the first time writing a value to it. After the creation of the node there are four operations "read, write, delete and browse".
The simplest way is to use Node-RED in combination with node-red-contrib-ctrlX-automation nodes (READ, WRITE), but you can use all kinds of clients supported by our ctrlX SDK.
We can deploy our flow by clicking on the deploy button, which can be found in the top-right corner of the Node-RED environment. Then press injects button in flow and a new abc child-node with a xyz node will be created in the Data Layer.

I have attached a readme pdf file at the end of this article, where you can find further information about which further changes you can execute in Key Value Database app.
I hope this article was useful. If you have any suggestions or questions, do not hesitate to contact me.