
- Subscribe to RSS Feed
- Mark as New
- Mark as Read
- Bookmark
- Subscribe
- Printer Friendly Page
- Report Inappropriate Content
Content
API documentations using the Swagger tool has always been a great choice for development purposes. Here in this article we explore how we can use the tool to generate client SDKs for APIs in various programming languages, so that we can access the APIs directly from our application without using HTTP requests.
Requirements
- Swagger editor installed or access the online Swagger Editor.
- ctrlX WORKS installed.
Steps
- Open ctrlX WORKS and start a virtual device.
- After successfully launching a ctrlX COREvirtual, open the virtual controls web UI in a web browser.
- Click on the help icon (?) >> API reference.
ctrlX WORKS Home
- Select any API reference whose client SDK is to be generated.
- Click on the API reference link as shown in the image below, to get access to the API documentation URL.
ctrlX API Documentation
- Copy the URL from the new tab.
- Open the Swagger editor and click on File >> Import URL, and paste the copied URL.
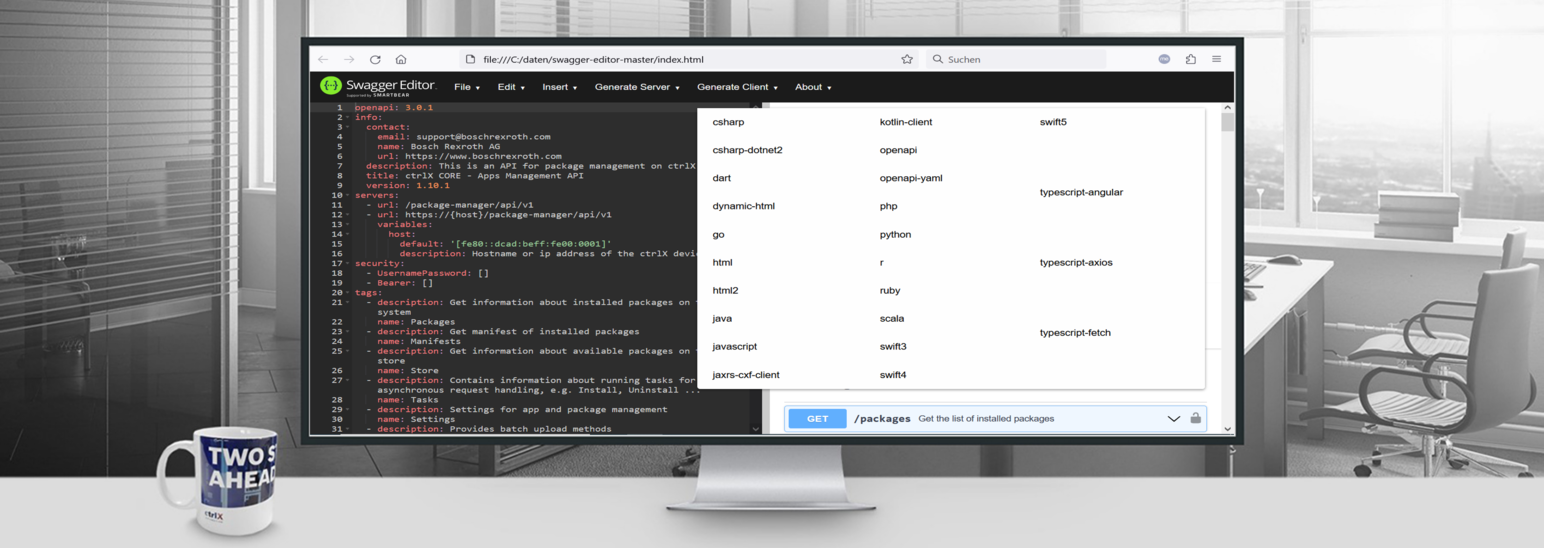
- After successfully loading the API documentation in Swagger, click on Generate Client.
Swagger Editor
- Select the preferred language for which the SDK is to be generated. The generated zip file will be downloaded and stored in the download folder, ready to be imported in your application.
Once the library is generated, it can be imported into the project as required.
Note: It is also possible to access the openapi.js (file containing the json of all API data) from the inspection window of your browser. Inspect>> Sources>> openapi.js
This might be helpful in cases where the link to the openapi json (API reference URL) is not directly available.

Examples
Following examples will help you understand the usage procedure for the libraries.
Requirements
- Visual Studio Code
- Running server of ctrlX WORKS
Setup in Angular
- On creating your Angular project, import the openApi generated library into your project. The import folder might vary based upon the project architecture. We here use a lib folder to store the libraries to store and import our self generated libraries.
Sample Angular Project
- On addition of library into the project, we add the path to the library in to our App.module.ts file as shown in the image below. After importing the File, we add the import variable ApiModule into imports array variable in @MyModule.
Angular app.module.ts
- After addition of the library path, we will start working with the library as per our needs. To show an example, we here import BatchService into our component. To learn about the service usage, we refer to the service description in the OpenApi file of the generated library folder.
Angular Import API library
ctrlX BatchService API Description
Setup in Python
For the demonstration, we are using google colab.
- Upload the library file in the google drive and mount google drive in the notebook as shown in the image below.
Google collab notebook demonstration
import swagger_client python setup.py install --user from __future__ import print_function import time import swagger_client from swagger_client.rest import ApiException from pprint import pprint configuration = swagger_client.Configuration() configuration.access_token = 'YOUR_ACCESS_TOKEN' - We are importing the Swagger client into the notebook which we use to access the API classes and their functionality.
Swagger API library usage demonstration
- Here now we simply use the required class and its function using the '.' operator.
Sample Python Scripts to run
As we can see, generating OpenApi libraries help in integration of the ctrlX WORKS Apis considerably, without the need to make individual HTTP requests to the server.

You must be a registered user to add a comment. If you've already registered, sign in. Otherwise, register and sign in.