
- Subscribe to RSS Feed
- Mark as New
- Mark as Read
- Bookmark
- Subscribe
- Printer Friendly Page
- Report Inappropriate Content
Alarm Management Guide
How to configure the Alarm Manager
Go to the Alarm Manager to configure all different warnings and alarms that can be triggered.
To add a new warning/alarm, click on “Create Entry” and insert all required field.

Add:
- “Alarm index”: a unique index identifying the alarm;
- An optional description of the alarm;
- “Alarm level”: =2, for an alarm; =1, for a warning; =0, for info;
- The optional “Alarm group index”: to group different alarms;
- “Trigger item”: the process variable that triggers the alarm;
- “Alarm type”: Use “Conditional” to trigger the alarm if the configured condition becomes true.
New alarm entry creation
New alarm entry creation
- Use “Value” to trigger the alarm if the trigger item reaches its prewarn or warn limit values set in the corresponding configuration page in the Process Data Manager.
Add prewarn and warn limits
- Add the “Acknowledge Alarm” check if the alarm needs acknowledge to be cleared.
Acknowledge alarm
- Add the “Log Alarm History” if the alarm needs to be stored in the alarm history.
Log alarm history
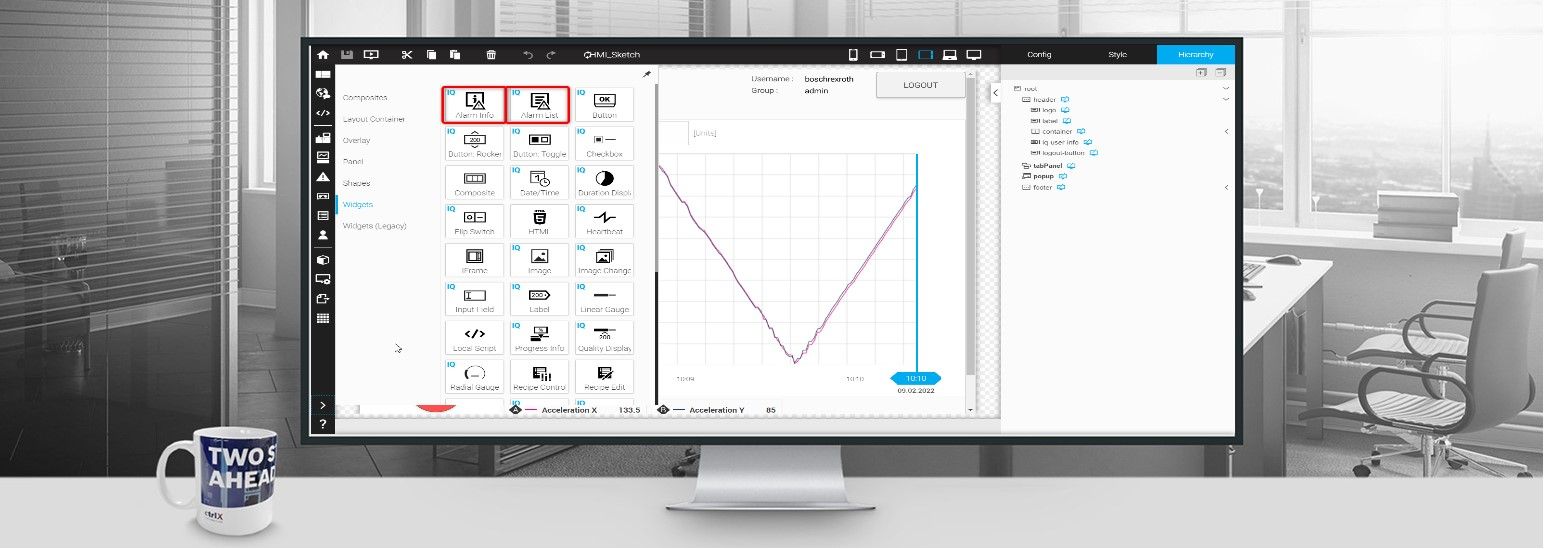
How to use the alarm widgets
Two different widgets can be used to display alarms.
The “Alarm info” widget shows the current alarm status. It displays alarms, warnings and infos.

The “Alarm List” shows the alarms and their status in a list. It can display either the online alarm list or the historical alarm list.

To configure the “Alarm List” widget as an online alarm list, you can select the “Only Live” option from the selection menu in the config tab of the specific widget. To use the widget as a historical alarm list instead, select the “Only Historic” option. The “All Alarms” option allows to display the current and historical alarms in a single list. 
By clicking the “Detail” button for each error/warning entry, the corresponding alarm details can be displayed.
The alarm details can be customized. To add links to pdf files and videos or to add references to configured process items, go to the Alarm Manager, select the alarm you want to configure the details to and fill the fields in the “Alarm context” section.
To create links to PDF files and videos, use the Context Attributes field.
Note: Every media content needs to be stored in the related project directory. You can create a new “media” folder in the project directory or directly copy the media content in the project directory (C:\Users\...\AppData\Roaming\webiq-designer\workspace). The path to the media file needs to be written in the Context Attributes field. For example: [URL]media/pdf/ctrlX_CORE.pdf
Please refer to "Attach PDF files to alarm details" video attached below.
To display existing process variables values or labels, new “Context Items” needs to be added.

For example, in this case, I’ve added the “prod_velocity” variable to the Context Items and used it in the alarm details. To configure the alarm details message, go to the Localization Manager and look for the specific “alarm_msg” string.

The alarm details can be written in the corresponding “Localized Text”. The configured Context Items can be retrieved by using the following expression:
- <%= items[0].label %> to display the item label;
- <%= items[0].unit %> to display its measuring unit;
- <%= items[0].value %> to display its current value.
Label and unit for items can be set in the Process Data Manager page, by selecting the specific item and fill the corresponding Label and Unit fields.

The Company
Empowering HMI Excellence
Smart HMI is a team of experts for the development, enablement and integration of 100% Web-Technology based Software, which empowers every customer to easily create future-oriented industrial HMI solutions. The Software Platform WebIQ – developed by Smart HMI -is a 100% Web-Technology based, forward-looking Visualization-System with comprehensive Design-possibilities to create industrial Web HMI’s.


You must be a registered user to add a comment. If you've already registered, sign in. Otherwise, register and sign in.